
Recent Changes August 2018
Address Card Layout Preferences
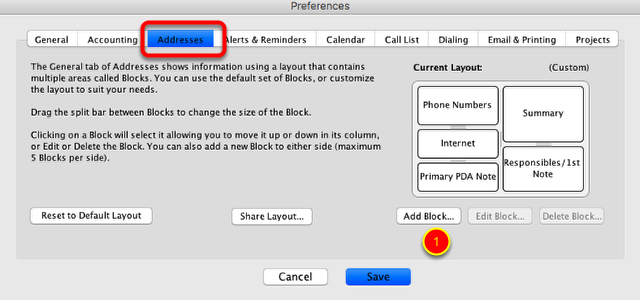
You can now Customize the Addresses General tab view. Options allow for a altering the the size, placement, and types of information displayed in different sections or Blocks.
1. To get started use the buttons to Add, Edit or Delete a Block.
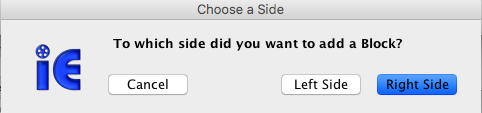
You will be prompted to choose which side of address card you want the information displayed.
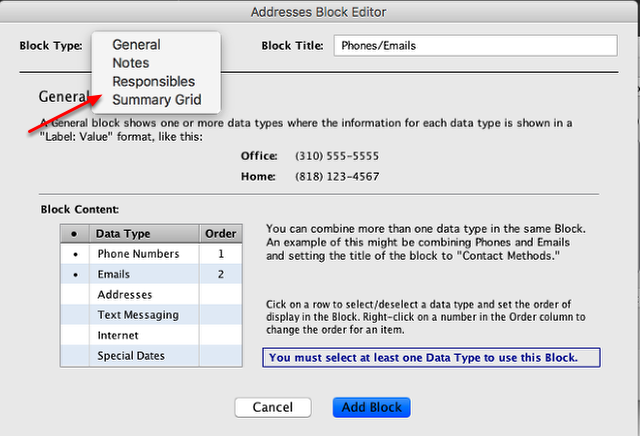
When adding a block you can choose from four different information types.
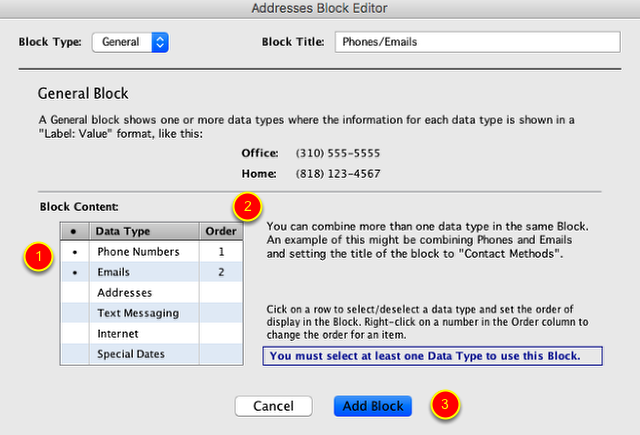
With the General block type:
1. Mark the types of data you'd like to combine with a "dot."
2. Assign the order in which to see them by right clicking in the "Order" Column just to the right of the data name.
3. When done, click Add Block to finalize your selections.

With the Responsibles block type you can display the "Responsible Agents" entered under the Accounting tab for a Client’s record or else the first Note from non client records.
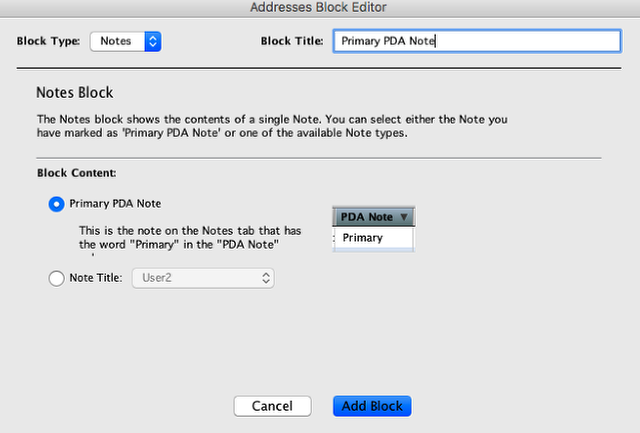
When using the Notes block type, you’re able to identify a single Note to be displayed by either the Title or use the designated Primary note.
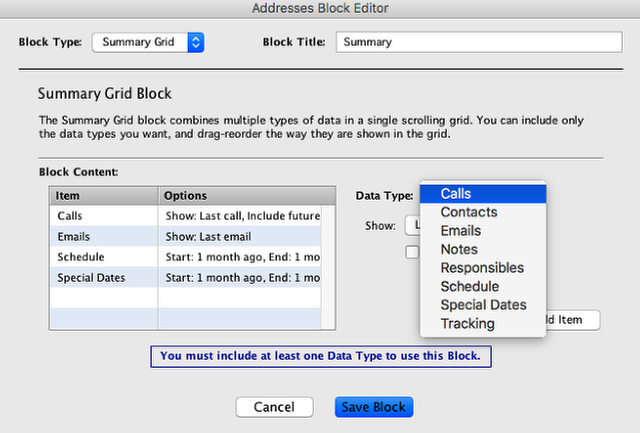
The Summary block is designed to let you include a number of data types with individual options, in a single block. These data types are usually associated with the history tab.
Remittance Advices and Accounting Reports
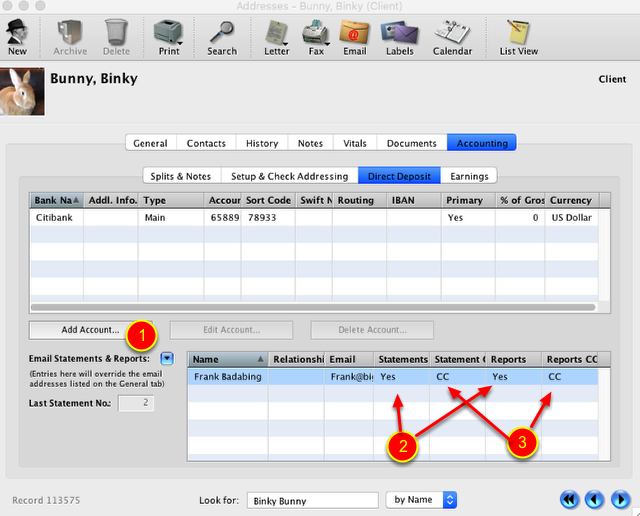
You can now add third party contacts to receive Remittance Advices and Accounting Reports via email on behalf of a client under the Addresses, Accounting tab, Direct Deposit sub-tab.
1. Click the small blue triangle to add a contact for Remittance Advices or Reports. *NOTE - The person you are adding must have an address record in the program.
2. Set the Statements and reports options to Yes or No, depending on which items the contact should receive.
3. Set the CC option to either TO, CC or BCC depending on how you wish this person to be added to the email.
Call List Tracking

You can now get prompts about contacts that haven't been contacted after a specified amount of time.
From the iE preferences go to "Call List".
1. Right click in the Name Field to add a contact for tracking. (R-Click on an existing name to remove it from tacking.)
2. Right click on the Frequency space to set how often calls should be placed to this individual from the pop-up menu.
3. "My Calls Only" should iE check just your call list for this contact or all call lists at the company.
4. Click "Save" when finished.
Tracking Principals on Projects.
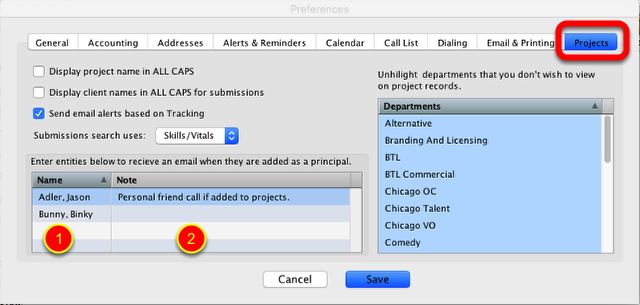
You can now get email alerts about contacts that are added to Projects.
Go into iE Preferences, Projects tab.
1. Right click to add or remove a contact from the notification feature.
2. Add a note to remind yourself why you wanted to be notified about this person.
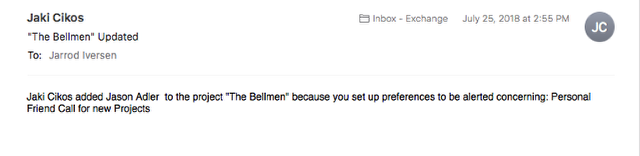
When that contact is added to the principals section or a new project is created containing that person in the principals section you will receive an email alerting you to it.
Client Payment Statements

You can now pull up payment statements for clients form the Booking record.
Go to the Fees and Expenses tab on a booking.
1. Right click on the Paid fee line status and you will get a "View Statement" Prompt the statement for that payment will open up in MS Word.
January 2018
Febuary 2017
January 2017
September 2016
August 2016
April 2016
February 2016
January 2016
October 2015
July 2015
January 2015
November 2014
October 2014
July 2014
May 2014
March 2014
October 2013
May 2013
October 2012
June 2012