inEntertainment Latest Changes
October 2012
Projects
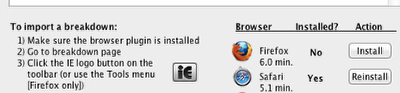
There have been important updates to the Firefox and Safari Plug-ins. In order for the imports to work properly it's crucial that you reinstall them.
Open any of the browser based import windows in IE, such as Breakdowns or Casting Networks, and click the "Reinstall" or "Install" buttons.
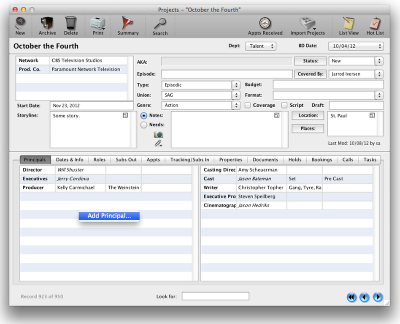
The adding and display of Principals on a project has changed. No longer will you see headings without a name unless you specifically want to see it that way.
To add a principal to a project, Right click or Control click in the area you want them to appear, and select "Add Principal." This will bring up a list of Principal types specific for that area.
You can also add just the Principal Type/Heading only, without entering a name associated with it, by selecting "Cancel" after choosing a heading and before selecting a name.
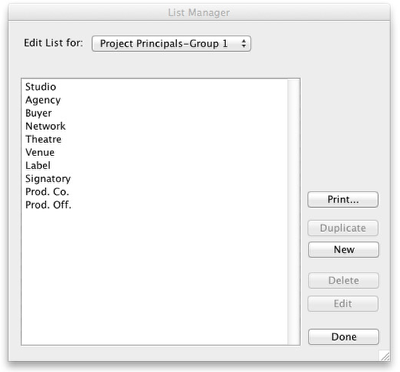
To add new a Principal Type to one of the four different areas go to the "Edit Lists" menu. And Choose one of the following Principals Groups...
Project Principals - Group 1, Upper Left corner of the project card. Examples are Studio, Network, Venue, Agency, Theatre.
Project Principals - Group 2, Lower Left corner. Examples are Director, Executives, Creatives and Producers.
Project Principals - Group 3, Lower Right corner. Examples are Casting, Writer.
Project Principals - Group 4, Below Group 3 on the lower right corner. Examples are Costume Designer, Hair & Makeup and other BTL artists.
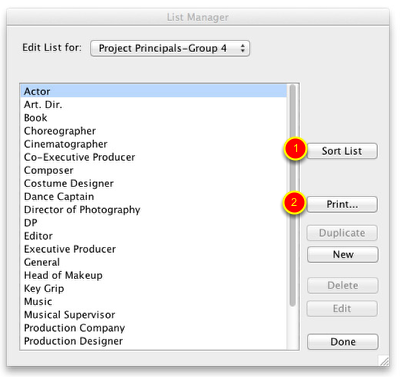
It is highly recommended that you go through and clean up the Projects Principals - Group 4. This list often is bloated with duplicates and will cause issues when trying to print reports or display lists and search results with only the columns you want to see.
1. Use the "Sort" button to sort the list in Alphabetical order.
2. Use the "Print" button to print out the list for company review.
Select the items from the list one at a time and click the "Delete" button. If there are Principals setup on existing Projects with that header you will be asked to reassign them to a different one from the list. For example, If you were deleting Exec. Prod. You would Reassign those entries to Executive Producer spelled out in the list.
Note* - Some items are reserved by the program and you will not be able to remove them.
If your company prefers the previous way the Principals worked a user with Admin access can setup default Principal headings to auto fill when a new project is created.
To do so...
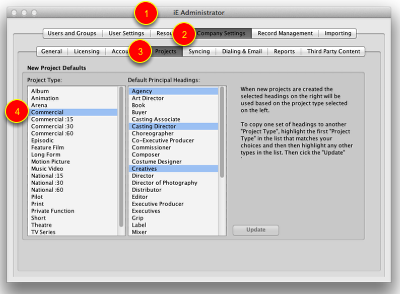
1. Go to the "Admin" module by click on the Admin icon on the iE Home screen or selecting "Admin from the "Go" menu.
2. Select Company Settings from the top row of tabs.
3. Select "Projects" from the second row of tabs.
4. Select the Type(s) or projects and the default Principals headings you would like to see when new Projects are created.
5. Click the "Update" button.
If you do not have admin access please call inEntertainment and one of the technicians can setup the default Principal headings for your company.

You can now import your electronic project submissions into iE from your browser.
1. First make sure the breakdown associated with the submission is already imported into your IE database.
2. From the list of your submissions, click and open the submission you want to import.
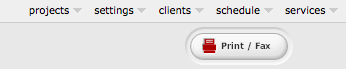
3. Click on the Print/Fax button which will display the Submission in a new window. You'll need to remember to close this window after each import.
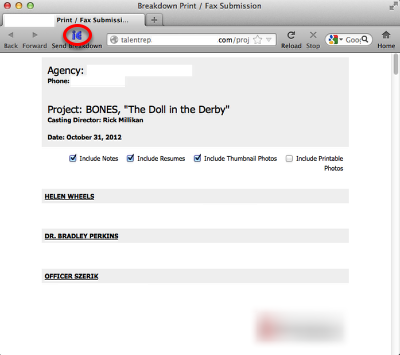
4. Click the IE "Send Breakdown" button in your toolbar. The project record will open first followed by a new submission window. If all your client names are matched with the names in the IE database, the submission window will populate each role with the clients you entered for your electronic submission. Make any additional changes you want and then save your submission.
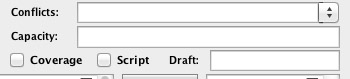
There is a new "Capacity" field for Projects. This is only visible when the project type is Venue, Theatre or Arena. Use this to keep track of what the total seating capacity is for a given venue.

You can now specify an appointment's Date and Time in three different ways.
At - The appointment is at a specific time.
Before - Used for a voice audition where the file should be uploaded before a certain time.
Due by - Used for a taped audition where the video is due by a certain date. Could be used to indicate an audition where the time has not bee set. (*Note-No time will be displayed on the appointments tab list when using this option.)
When creating reports you now have the option to control the results.
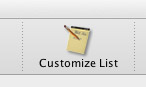
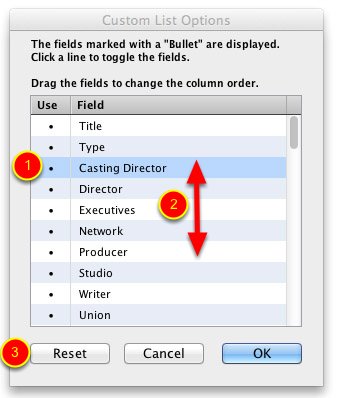
Click the "Customize List" button in the toolbar in upper right corner to bring up a list of available fields for a project report. Using this option you can determine which fields appear in the results and in which order.

1. Double Click in the "Use" column to turn a field on or off.
2. Click and drag on a field up or down to change the order.
3. Use the "Reset" button to return the list to the default settings.

You can now view the Projects List View as a directory similar to other online industry web-services.
1. In the upper right corner click and hold on the "View" icon to switch between the standard Column or the new Directory views.
Bookings

This same feature for project reports is also available in the Bookings Module and it works the same way as the projects.
Click the "Customize List" icon in the top right corner to bring up a list of available options.
1. Double Click in the "Use" field to turn a column on or off.
2. Click and drag on an item up or down to put them in the desired order.
3. Click the "Reset" button to return the list to the default settings.
Documents
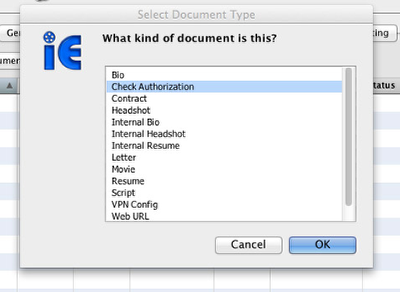
There is a new document type called "Check Authorization." When a client has a PDF Check Authorization embedded or linked in documents section of their address record it will be attached to an outgoing email when you email the check autho from a booking. This document does "not" have to be marked for email.
Addresses
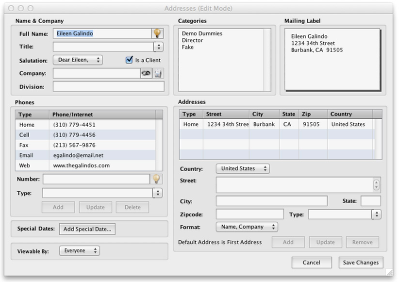
New Addresses edit mode layout allows you to delete multiple phones and addresses at one time.
You shift click or command click and hit the delete key.
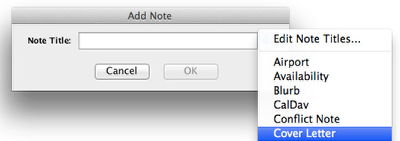
There is a new "Notes" title called "Cover Letter". When you email the clients documents using "Send Documents" to someone the program with use this note as the main email message for that email.
Call List
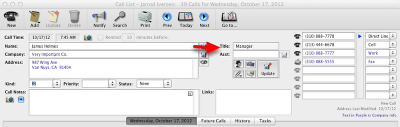
A contacts Title is now displayed in the top section of the call list.
Accounting
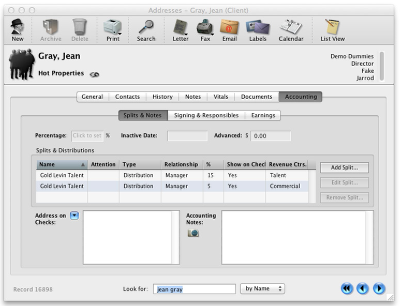
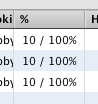
You can now specify the percentage in a given split by Revenue Center under the Accounting Tab on a clients address record.
In the example pictured above we have a distribution split setup for a manger where all the Talent bookings, (Feature Film, Episodic, Etc.) will be done at 15% of the client's gross but Commercial bookings, (Commercials, Print, Etc.) will be done at 5%.
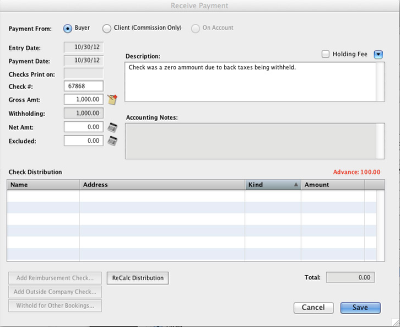
You can now enter a $0.00 amount check for a client and save it to the system.
Note* - When entering such a payment , if the talent still owes you commission on this job, you should immediately enter and advance on the clients address card under the accounting tab so you can recoup the unpaid commission.
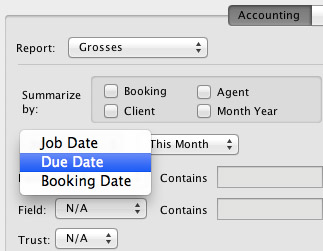
In the Grosses report you can now choose "Due Date" in addition to Job Date and Booking Date to see a report of monies paid and due for a certain time period.
For example if the date range is this year, then all bookings with due dates for this year will be selected and only payments applied within that year will be reflected.
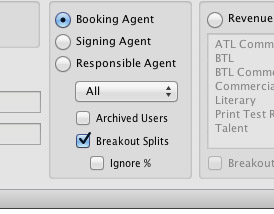
In the Earnings and Grosses Reports you now have the option to break out the internal splits for each booker. Previously this was the only option available.
When the "Breakout Splits" button is unchecked the percentage column will display only the company percentage. If more than one booker is listed under the splits area of the accounting record their names will be combined in the "Booked By" column.
When the "Breakout Splits" button is checked, the information displayed will show the percentage for the company followed by the percentage allocated to each booker. The total amount displayed will be the same, but the amounts for each line will calculated based the bookers percentage.
Additionally when the "Breakout Splits" button is checked, you'll also have the option to check the "Ignore Percentage" button. When checked, the amount displayed for each job will be the total amount without regard to the internal split. Therefore your grand totals will increase and will not be reflective of the actual amounts received or due.