This FAQ will guide you through adding Fees and Expenses to a booking for Accounting and Invoicing uses.
*NOTE Not all users have access to the Fees and Expenses Tab.
Step 1
Once you have entered all the details for a booking click the Fees and Expenses Tab (1), then click the “Edit Expenses” button (2).

Step
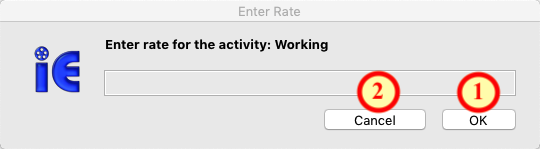
If you have setup a work schedule, (under the schedule tab), for the client you will prompted to enter a rate for the different activities you have created on their schedule. Enter the rate and hit “OK” (1) or click the “Cancel” button (2) to setup the fees manually.
Step 3
If you entered the rate the fee(s) will be automatically created for you.
Step 4
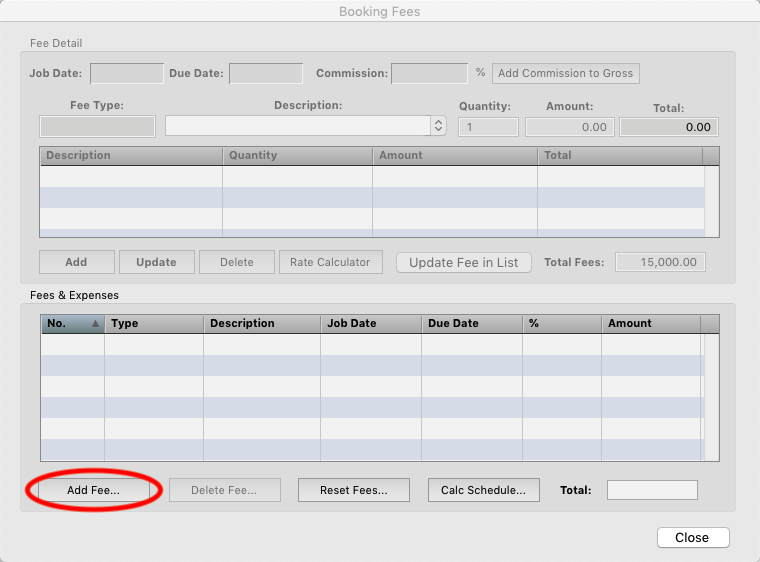
If you clicked “Cancel” in step 2 or if you don’t have a schedule yet, click the “Add Fee” button at the bottom of the window.
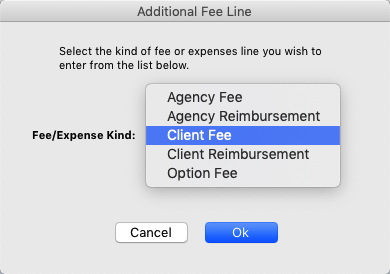
Step 5
You will be prompted to choose which kind of fee you want to add then click OK. The kinds of fees are:
Agency Fee – This is the fee production pays your company for hiring your talent.
Agency Reimbursement – These are things the Agency paid for and production reimburses them.
Client Fee – Regular fees a client gets paid for working a job. (This is the default fee.)
Client Reimbursement – These are things the client pays for by them self and production reimburses them for, (example: airline tickets, manicures, etc).
Option Fee – Monies a client might be receiving but are not guaranteed.
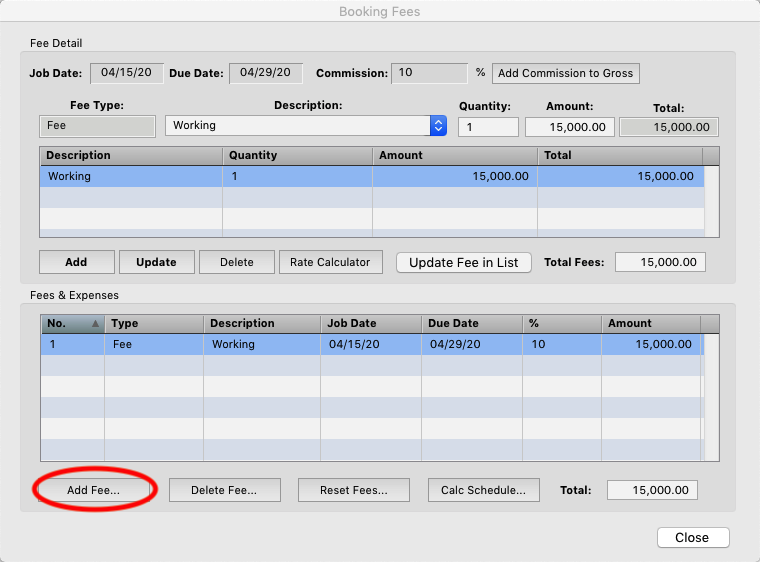
Step 6
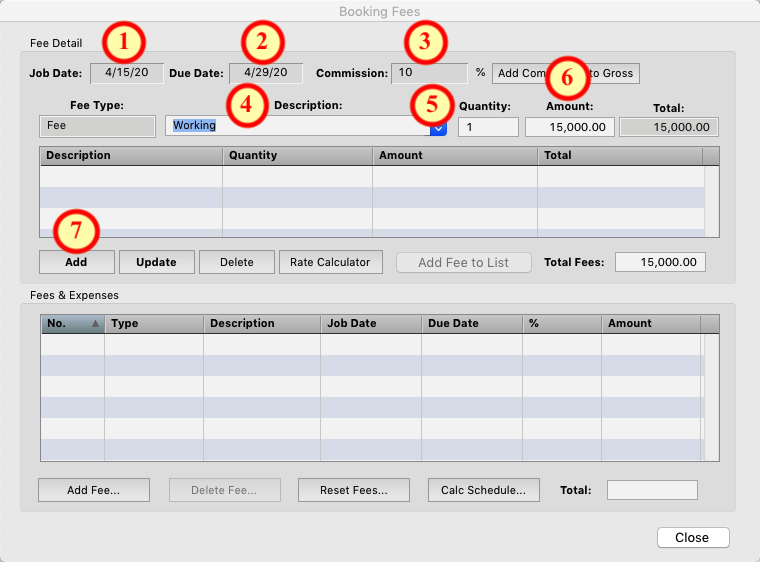
Enter the Job Date (1), Due Date (2), Commission Rate (3). Then enter a Description (4), Quantity (5) and Amount (6) for the Fee. Then Click the “Add” (7) button.
*NOTE If the commission rate is using one of the Scale + options click the “Add Commission to Gross” button and the program will calculate and add your commission to the gross entered.
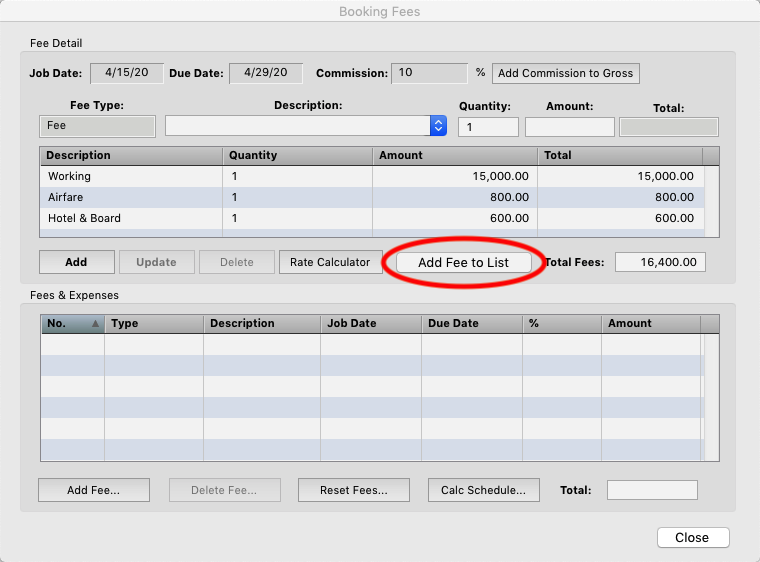
Step 7
You can add additional expenses for the job, itemizing it like on a check stub, click “Add Fee to List” when finished.
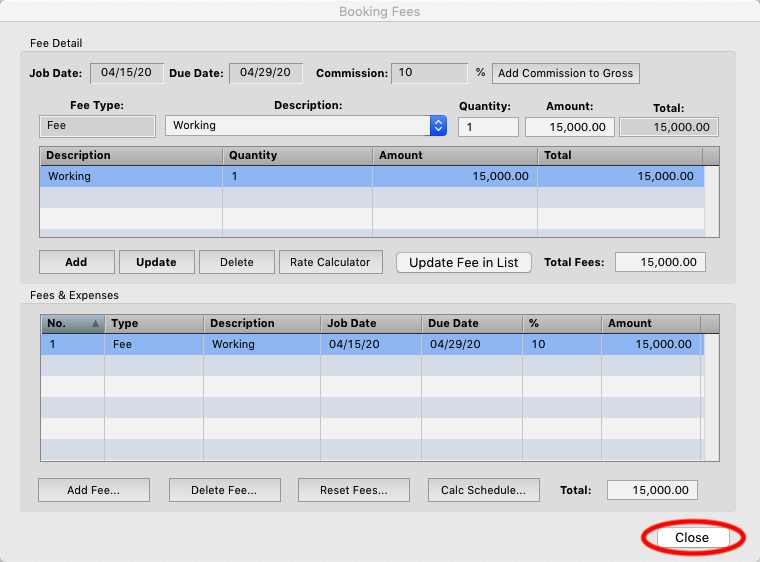
Step 8
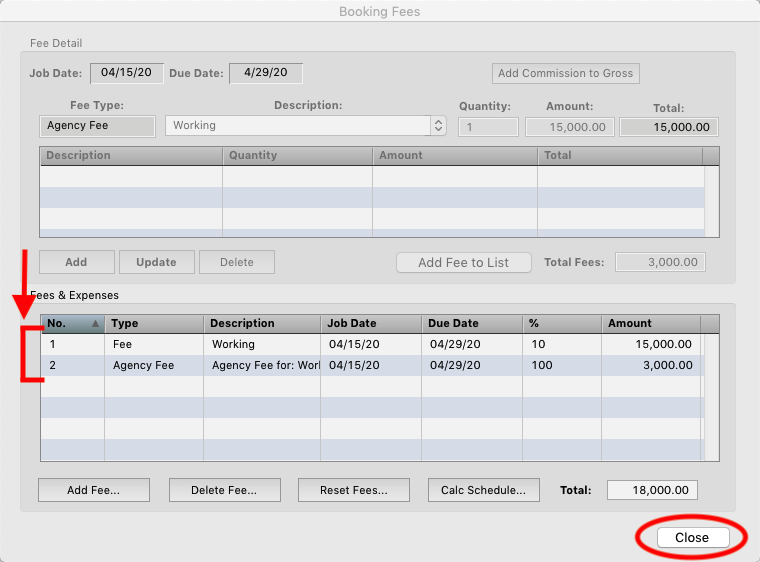
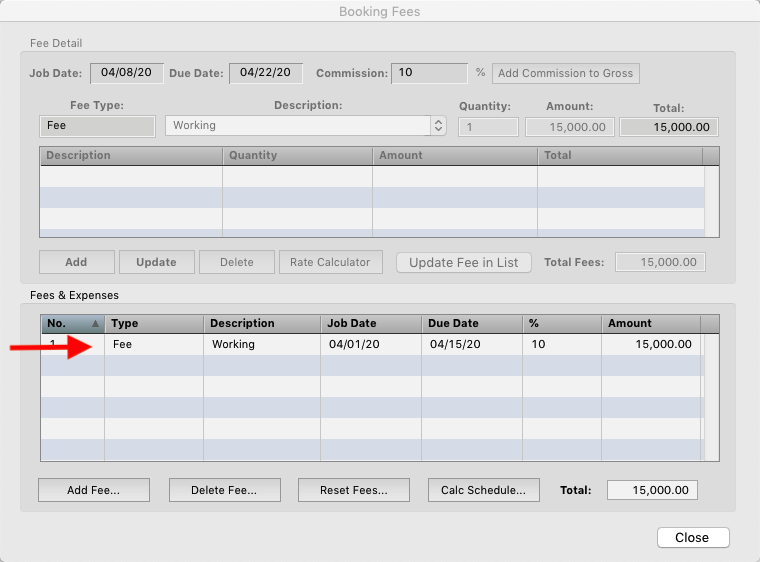
You will see the Fee you added in the Fees and Expenses area. If you are finished click the “Close” button or add additional fee lines.
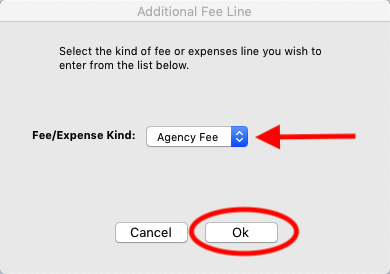
Step 9
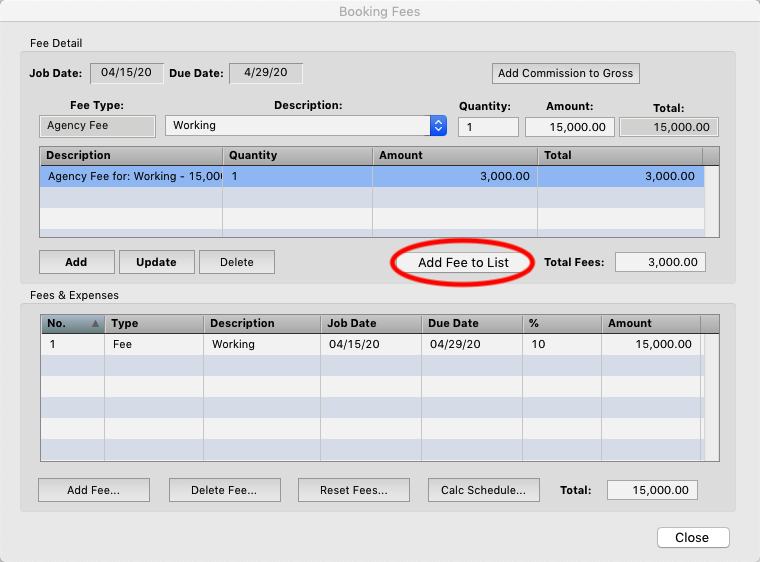
To add an Agency Fee select the client fee line you added and click “Add Fee” at the bottom.
Step 10
Select “Agency Fee” from the pop-up list and click “OK”.
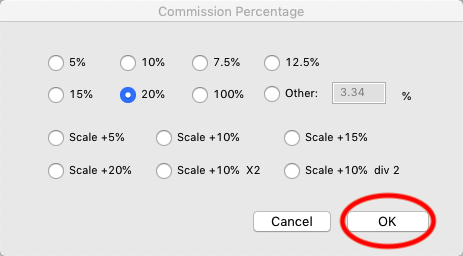
Step 11
Select the percentage rate of the Agency fee to be added. Click “OK”.
Step 12
The agency fee will be automatically calculated based on the client fee line(s) you had selected. Click “Add Fee to List”.
Step 13
You should then see both the Client Fee and the Agency Fee in the list of Fees and Expenses, add more fees or click “Close” if done.
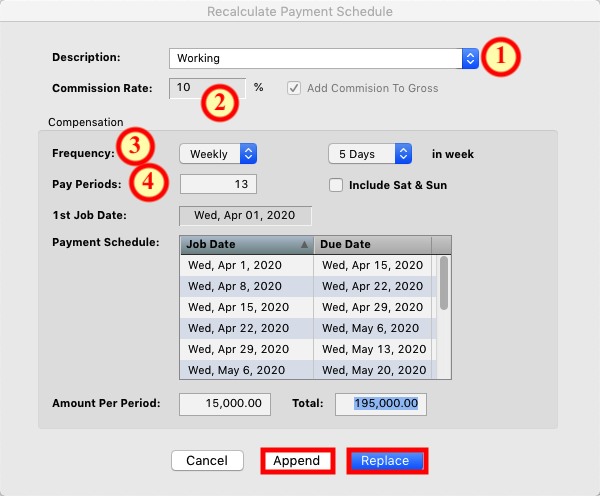
Step 14
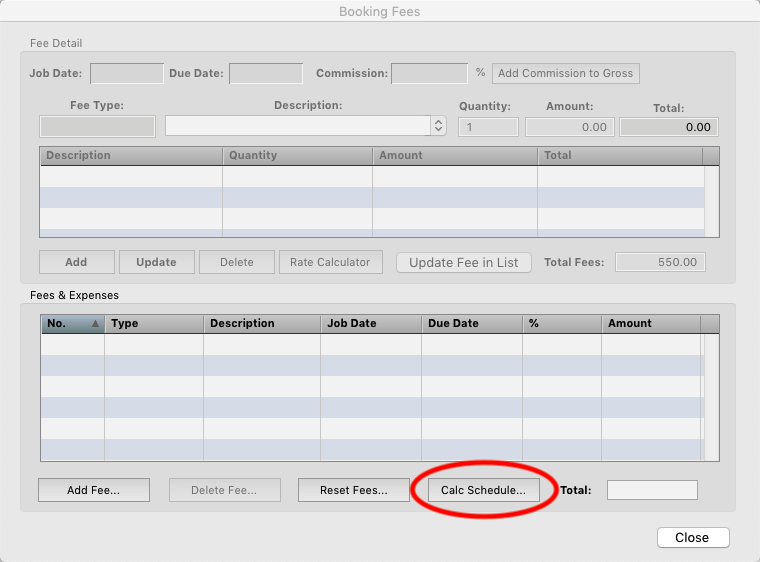
If a client is a series regular or is working multiple weeks on a job you can calculate a schedule of the payments they should be receiving. Click the “Calc Schedule…” button.
Step 15
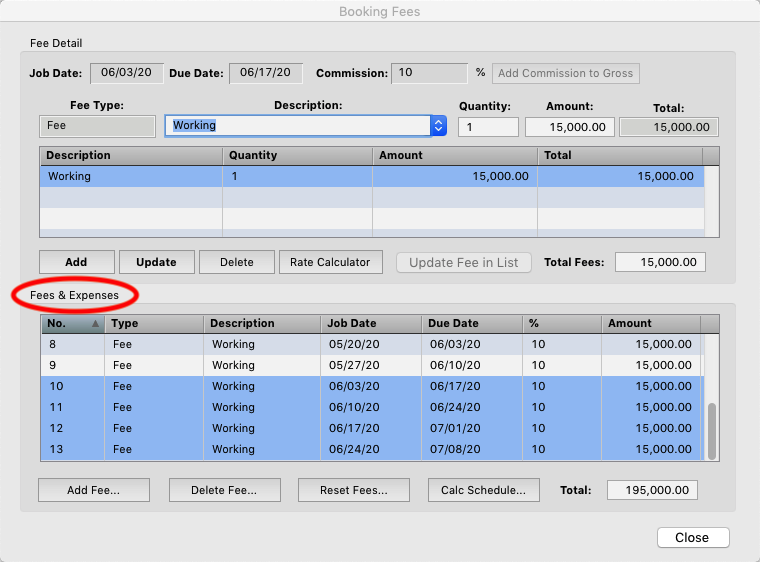
Enter the a description for the fees or use one from the pop-up menu by clicking on the blue button to the right of the description field (1). At the Bottom of the Description lists like Due Date and Episode number. If you use one of the these options like episode number and enter the beginning episode number on the description line, iE will fill in the next episode number on each line it creates. Set the commission rate for the job (2). Set the frequency you expect payments to be made, (weekly, Monthly, etc) and number of days in a production shoot week (3). Enter the number of pay periods, (episodes), the client will be shooting and if they will be shooting on weekends (4). At the bottom you can enter the amount the client will be paid per period OR the total amount they will be pad for the job and iE will calculate the amount per period for you. Click “Append” or “Replace” when finished.
*NOTE If there are additional weeks, (episodes) added you can repeat steps 14 and 15 and “Append” them onto the schedule you created.
Step 16
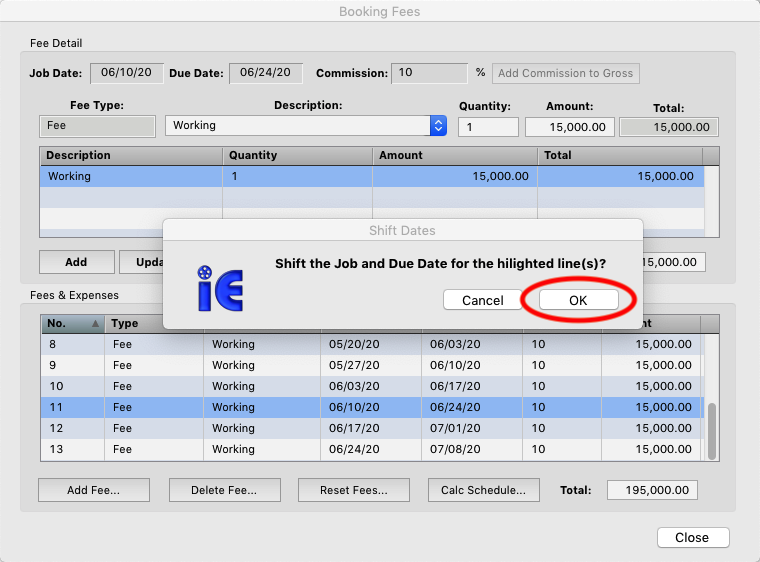
If the schedule has shifted, you can change the dates by going back into the Fees and Expenses, then select the lines that need to be changed.
Step 17
R-Click on the Job Date of the first on you selected. You will then be prompted if you want to shift the schedule for the selected lines. Click OK.
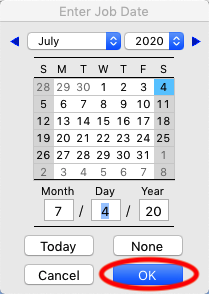
Step 18
Select a new job date and click OK.
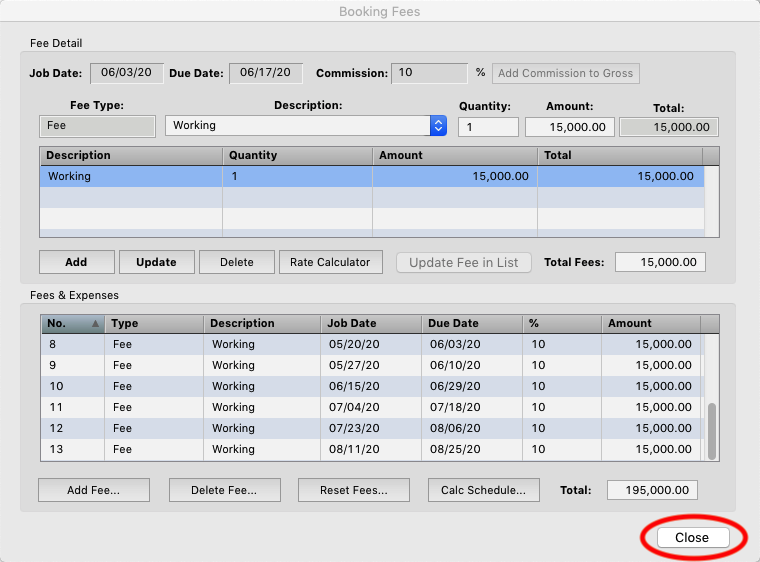
Step 19
The selected lines will now be shifted according to the new date you selected according to the schedule frequency you originally set. Click “Close” when done.
Step 20
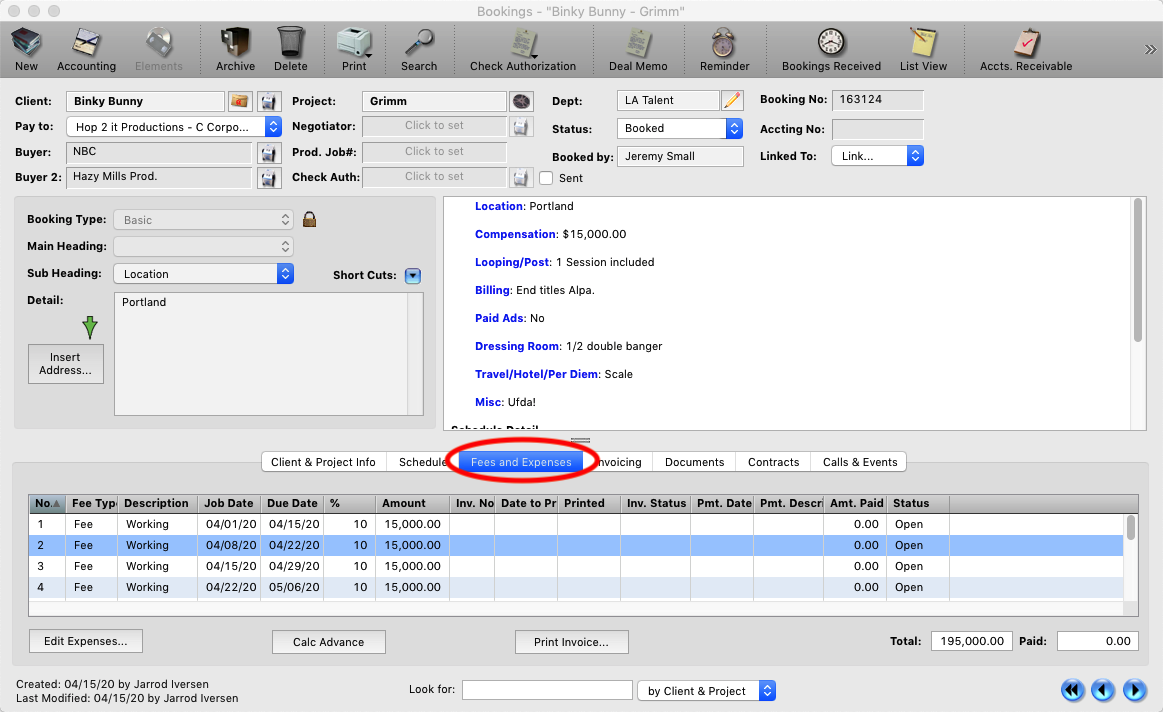
The fee lines you added will be displayed now on the Fees and Expenses tab.
*NOTE – You can edit and delete fees you have added until there is an accounting record attached to the booking. You can add NEW fees but editing existing ones requires accounting permissions.