This FAQ will guide you through creating and sending iE Client Calendar App and Web Calendar access codes to your clients. (The Client Calendar App for iOS can be found here iE Client Calendar App ) or sharing/ using a clients web calendar code with/from their other reps.
*NOTE The Web Calendar and the Client Calendar App will allow your clients to see appointments, bookings, etc. you have entered from the program. They can only view these events they can NOT alter them. They CAN add events to their calendars which push to your iE for bookouts and availability.
*NOTE If your client already has an iE Calendar App/ Web Calendar code from a different representation you can use the same code so the client has one calendar from both companies. Instructions for using an existing code from a different rep can be found below starting at step 5.
Step 1
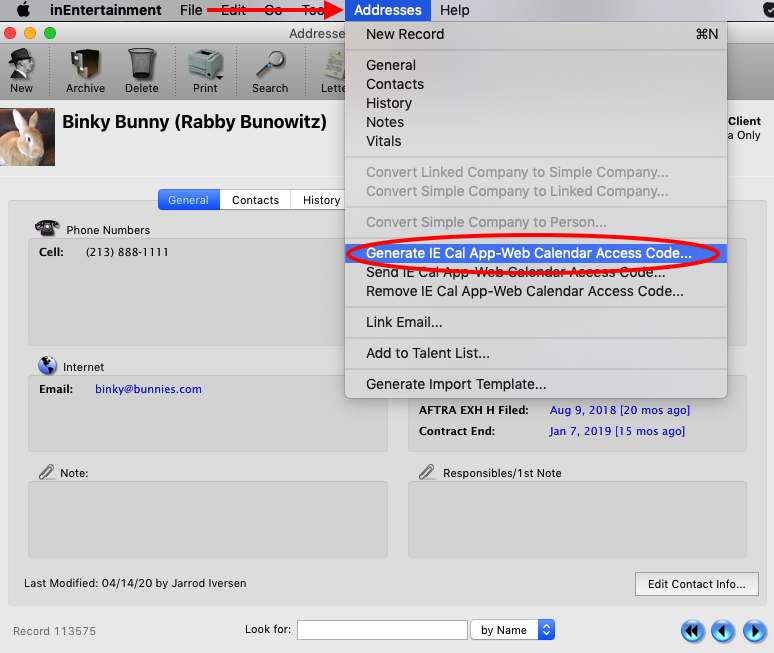
Open the client’s address record and go to the Addresses menu between Tools and Help at the top of your screen. Select “Generate IE Calendar App Web Calendar Code”.
Step 2
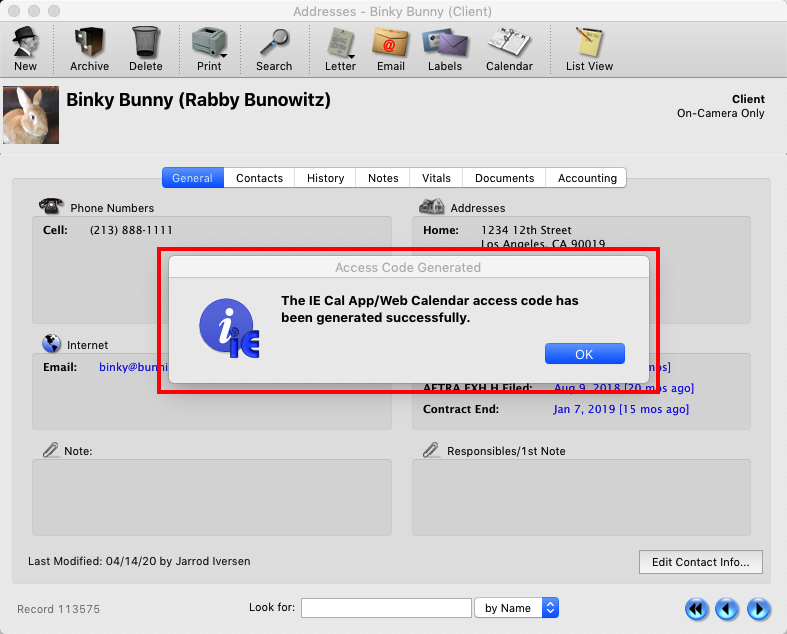
You will be notified that code has been generated.
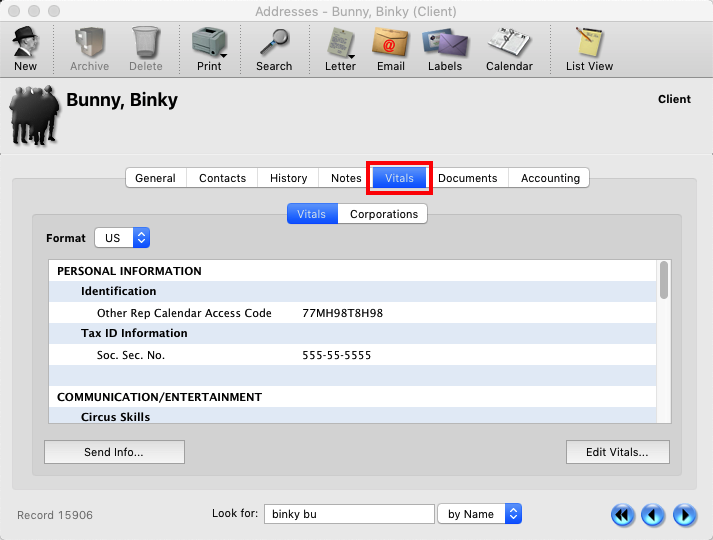
*NOTE You can view the code under the Vitals tab of the client’s address record.
Step 3
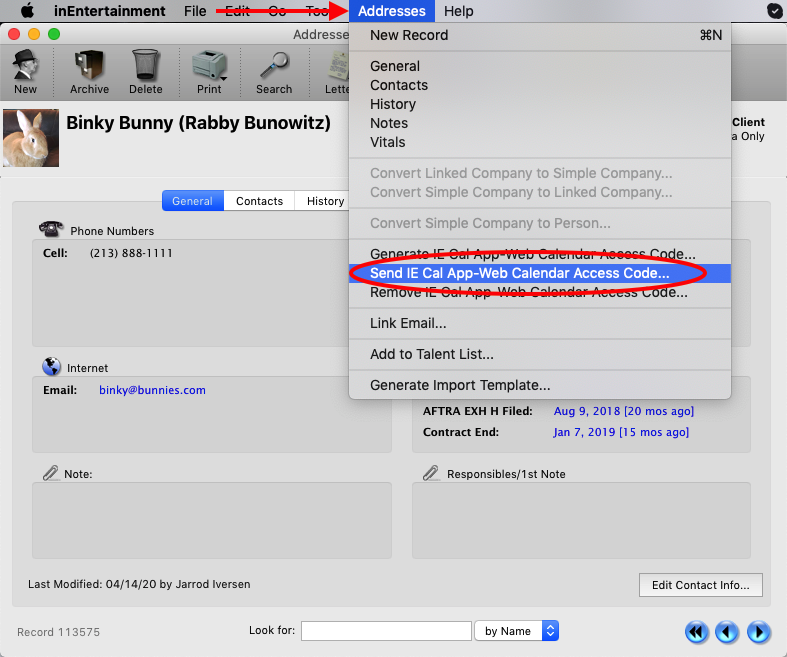
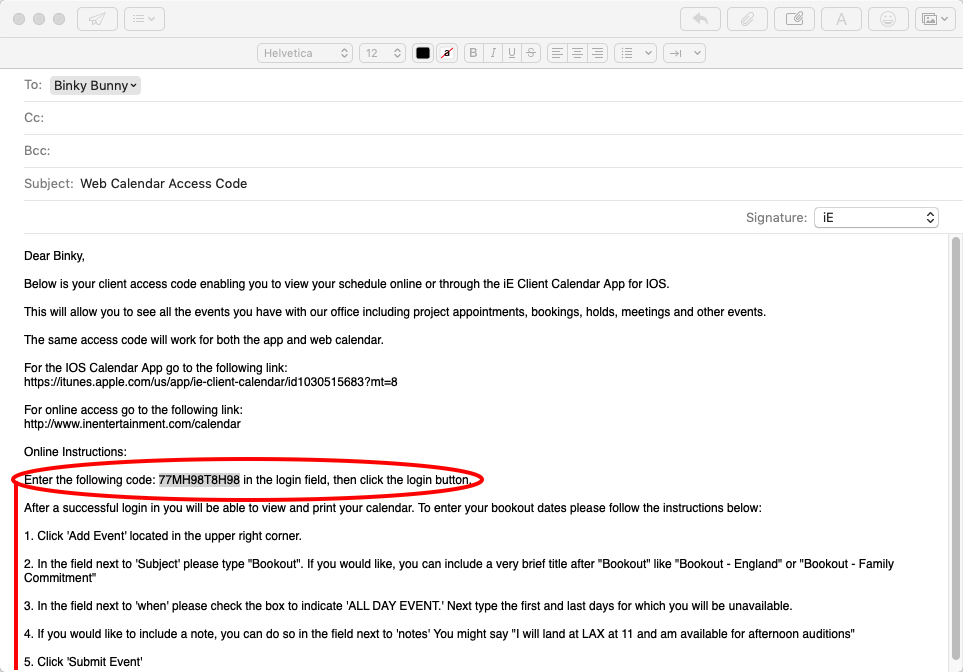
To send the code to the client, go back to the Addresses menu and choose “Send iE Cal App-Web Calendar Code”.
Step 4
And email to the client containing the code as well as instructions on how to log in and enter bookouts will open in your default email program.
Step 5
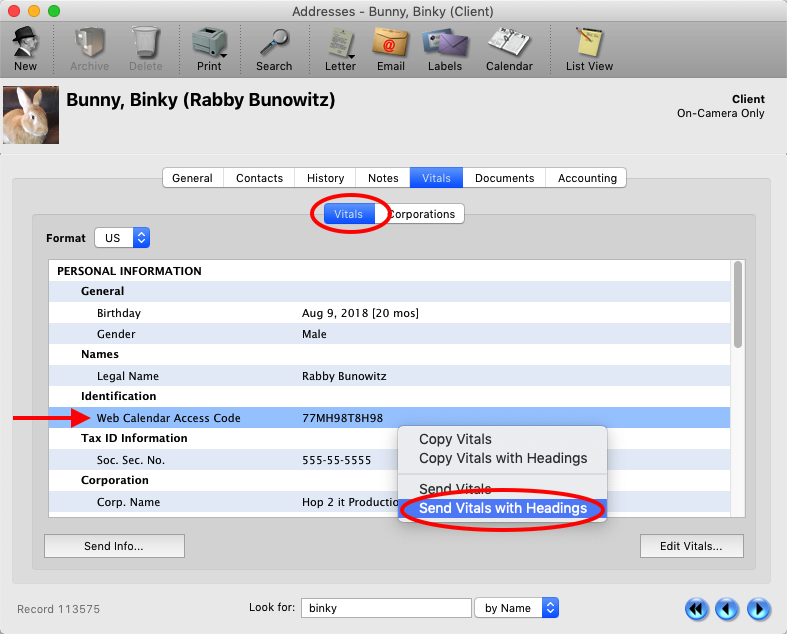
To share your client’s Calendar App/ Web ID with their other representation, go to the client’s address record > Vitals tab. R-Click on the Web Calendar Access Code and choose Send Vitals or Send Vitals with Headings from the pop-up menu.
Step 6
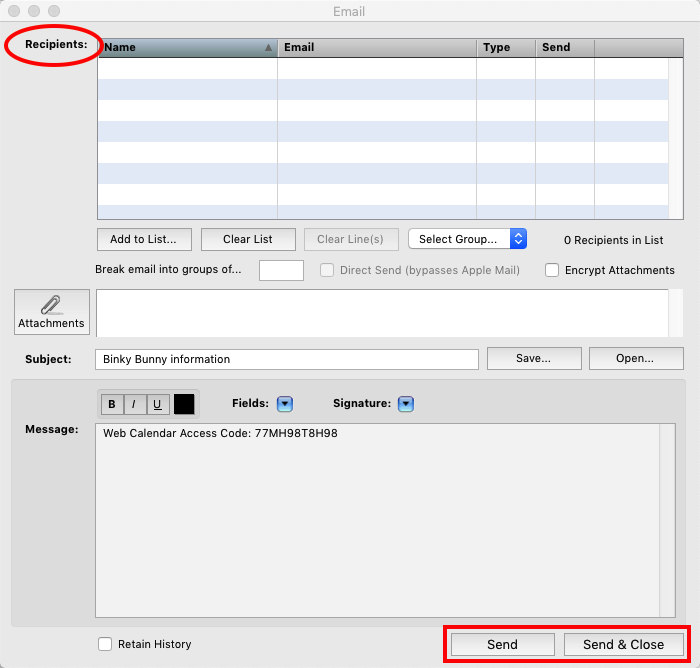
The iE compose email window will open with the vital in the body. Add recipients and click Send or Send and Close.
Step 7
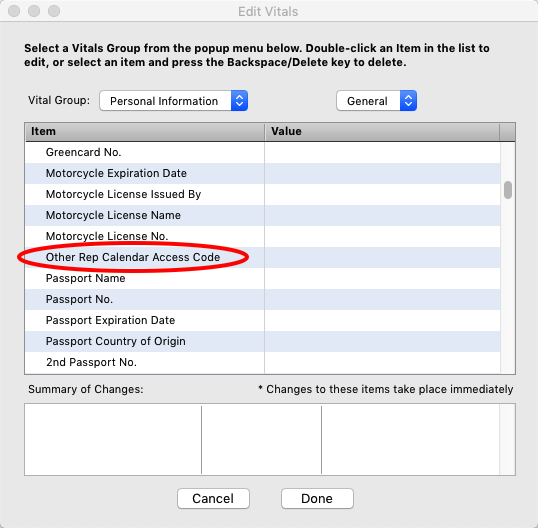
If you client already has a code form their other representation go to the client’s address record > Vitals tab and click the edit vitals button.
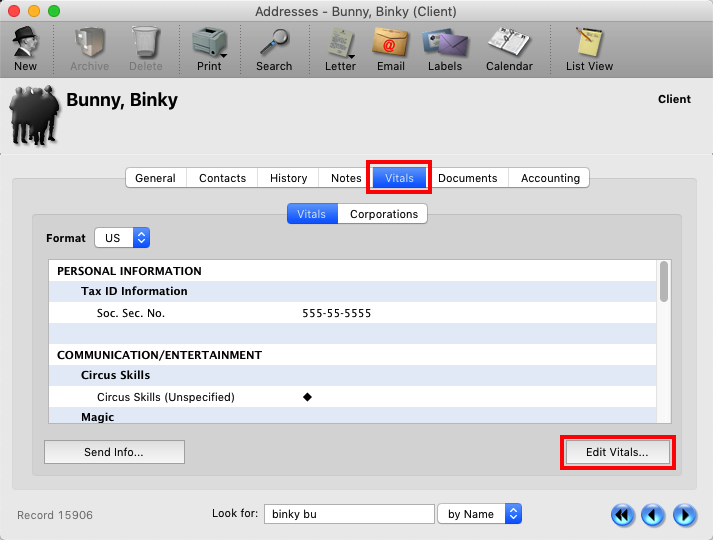
Step 8
Under the Vital Group Personal Information, scroll down to the Identification section and locate the item “Other Rep Calendar Access Code”. Double click in the empty value space next to the item.
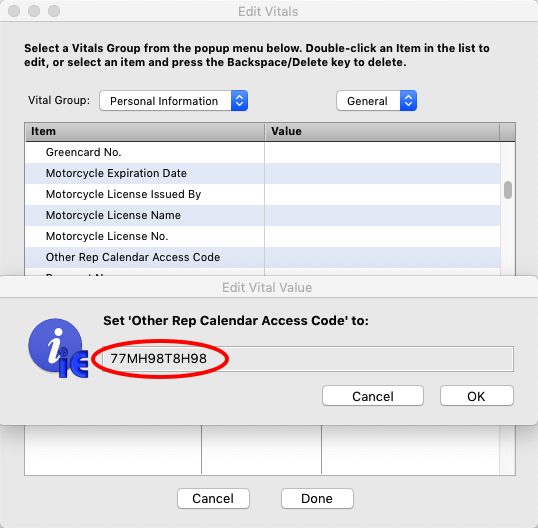
Step 9
Enter the code the client has provided form the other rep and click OK.
Step 10
The code will be displayed and listed on the bottom of changes to be made to the address record. Click Done.
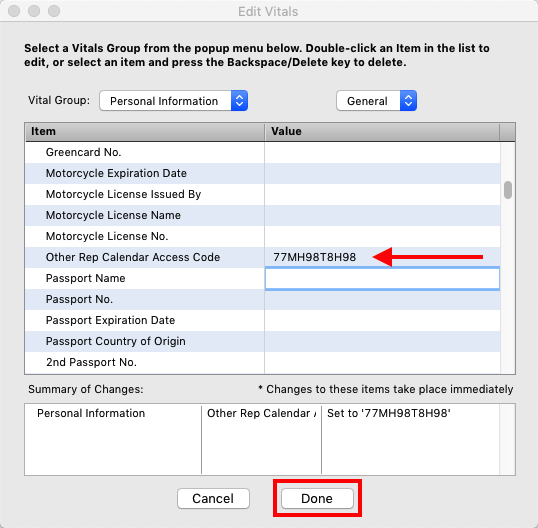
Step 11
You should see the item in the list of vitals.